New Online Options Available Now Learn More

Order Warranty

Author: Platinum Team

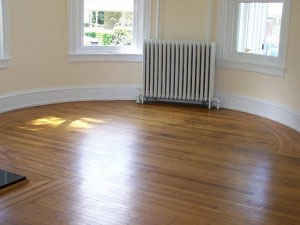
spaceheaterThere are few things more beautiful than hardwood flooring in a home.  It is timeless and adds a natural elegance and sophistication to any home.  There are a vast amount of finishes, widths and styles when it comes to hardwood flooring and it can truly be selected in any design to fit any decor aesthetic.  Because hardwood flooring is so popular in so many homes, homeowners are looking for the best ways to care for those hardwood floors.  After all, purchasing hardwood floors is no small investment and in order to best protect your investment, you need to take good care of your floors.  Caring for hardwood flooring is different than caring for other types of flooring like ceramic tile or laminate.  Follow the hardwood floor care tips below and keep that beautiful flooring in perfect condition. 1. Prevent Dirt From Being Tracked Inside
Place mats outside of all exterior doors.  By ensuring that those entering your home have to step on the mat first, it will help reduce the amount of dirt that gets tracked inside on a daily basis.  One of the most common frustrations of those with hardwood floors is that it constantly shows dirt but by reducing how much can actually be tracked in, it will save you a lot of frustration.  Additionally, if you ask your family to take their shoes off at the door when they come home this will also help reduce the amount of dirt that gets tracked in.

2. Determine Finish Before Cleaning

You need to determine the finish because the finish will help dictate your cleaning methods.  If your floor is sealed, a few drops of water will stay on the surface but if it is not sealed, the water will soak into the floor.  Most newer hardwood flooring is surface-sealed with a protective coating that will help prevent stains and water damage.  Surface-sealed floors simply need to be swept and mopped and they are clean.  For penetrating-seal treated or oil-treated floors they need to be cared for more carefully and need to be waxed to properly protect them.

3. Clean Spills Immediately

Just a few drops of water?  No big deal?  Wrong.  Clean any and every spill as quickly as possible to prevent damage from happening.  Hardwood floors are very susceptible to damage so work hard to protect your investment by quickly cleaning spills before they can leave a mark or, with bigger spills, warp beams.

4. Protect Your Hardwood

Protect your hardwood flooring with area rugs and felt pads under the legs of furniture.  Scuffs, scrapes and even permanent marks can be left in the wood from furniture being moved around or from people walking in high heeled shoes.  Protect high-traffic areas with different sized area rugs so that your flooring is not damaged.

5. Bring In The Professionals

When in doubt, it is always a good idea to let the professionals take care of your floors.   Professionals will be able to help properly clean and protect your flooring so that you avoid permanent damage and keep your floors looking as beautiful as the day they were installed.

The garbage disposal is an incredibly helpful household appliance that most of all take advantage of.  It reduces the amount of food that you have to throw in your trash which helps cut down on how many trash bags you use and helps reduce odor for the trash can.  But, any garbage disposal that gets used with some regularity is bound to start to smell a little from time to time.  And once that garbage disposal starts to smell, you will notice it when you wash dishes and spend any amount of time in your kitchen.  If you do not do some work to clean your garbage disposal, that smell will stick around and keep bothering you.  Your garbage disposal may seem like a dark place where you cannot really see what is happening so how exactly will you clean it?  But, there are some very easy ways to clean your garbage disposal and keep those nasty odors away. 1. Prevention is Key

You can help avoid odor from accumulating in your garbage disposal by avoiding putting the wrong things down the drain.  Never put things that are not biodegradable down the drain and never put any liquid grease down the drain.  Liquid grease will cool and harden which will cause clogs.  Foods like bread or pasta will absorb water and expand, also causing clogs.

2. Use Cold Water

Turn on the cold water and the garbage disposal and let them run.  It is best to use cold water and let the water run for 30 seconds after you turn the disposal off.  Often, the odor comes from food particles that have been crushed up adhering to the walls of the garbage disposal and eventually starting to smell.  Many times, by running the water and garbage disposal for a minute or two you can get rid of that bad odor.

3. Use Citrus

The peelings from a lemon or orange work wonders when put down your garbage disposal.  The garbage disposal will grind up the peels and they will release their naturally wonderful smell while also helping to clean the blades.

4. Ice Cubes

Grind up some ice cubes in your garbage disposal.  The ice cubes will help remove built up food particles and will sharpen the blades as it grinds.  To give the ice a boost, pour some dish soap in while it is grinding and it will give it some extra cleaning power.

5. Vinegar & Baking Soda

If those pesky odors are still sticking around, some common household items will get that garbage disposal clean in no time.  Pour 1/2 cup - 1 cup of baking soda down the drain and then pour 1 cup of white vinegar down the drain.  Let it works its magic for about 30 minutes and then run  some water down the drain to clean everything out.  The baking soda and vinegar will loosen tough, dried on food and other debris and the water will rinse it all away.

6. Bleach

When all else fails, pour a mild bleach down the drain while cold water is running and the bleach will also help loosen food particles and clean the disposal and pipes.

chores
 
Reclaiming Home: It’s a messy task, cleaning the kitchen, but what if you actually derive a smidge of pleasure from those tasks? Learn how to turn home cleaning tasks into chores galore.

Every homeowner has one, and for most homeowners, it is probably a mess - the junk drawer.  Everyone needs a place to keep all of their odds and ends - pens, paperclips, tape, matches, note pads, rubber bands, and who knows what else.  Every home is different and every junk drawer is different, making the task of organizing it all the more challenging for most people.  There is no "one size fits all" approach to organizing the junk drawer but, there are a wonderful selection of organizing supplies available for purchase at most stores and there are some basic tips every homeowner can use as a guideline for organizing their junk drawer.  By following these tips, the next time you need a rubber band or paperclip you will not need to waste time digging around and crossing your fingers that you will find what you need, you will know exactly where it is. 1. Start Fresh

You cannot properly organize your junk drawer without completely emptying it.  Take everything out and keep like-items together as you go.  This will make the process of putting everything back much easier.  With everything out of your drawer, wipe it out and start with a completely clean drawer.

2. Throw Things Out

For many people, throwing things out can be a challenge.  They wonder - "What if I will need this one day?"  Or they say, "What a waste to throw out this perfectly good Easter magnet from 5 years ago, maybe I will need to erase something!"  But, here is the rule of thumb - if you have not used it in 6 months to 1 year, throw it out or give it away.  If you have not used it recently, the likelihood of you ever using it is slim to none.  So, why keep storing things in your drawer and adding clutter that you will never use?  Make room for new things you will actually use.

3. Purchase Organizational Items

If you have a lot of small things to organize, you will probably want to purchase some drawer organizational items.  Before making any purchases, measure you drawer and get exact dimensions so that you can know what types of items you need and what will fit.

4. Organize Like-Items

If you have a lot of small office supplies like paper clips, push pins, rubber bands, erasers and more, keep them all near each other in the organizer.  If you have other things like batteries or small tools, keep them in a different section of the organizer.  Separate pens, pencils and markers and give them each their own section if possible.    Put tape in its own compartment and scissors in another.

5. Label It!

If certain compartments work really well for certain items, use a label maker or a sticker label and label the compartment.  That way, anyone who uses the drawer and takes something out will know exactly where to put it away when they are done.  It will help everyone keep the drawer organized.

roofAs summer winds down, the kids head back to school, and we realize that fall is soon to be upon us. Soon those warm temperatures will turn cool, leaves will fall and the seasons will change.
Just like we prepare our closets and change out our summer wardrobe to fall and winter clothes, we need to prepare our homes for fall weather. Home maintenance is the key to keeping your home running properly, prolonging the life of appliances and protecting your investment. By following the steps below, you can prepare your home for fall so that it works as it should throughout the season.

•Seal Leaks and Drafts Every time a season changes, it is important to check window and door frames and all around the home for any cracks or holes that could lead to leaks and drafts. Nothing is a bigger home energy waste than leaks and drafts. Keep your home toasty warm this fall and keep those heating costs down by sealing any leaks or cracks before the temperatures change.

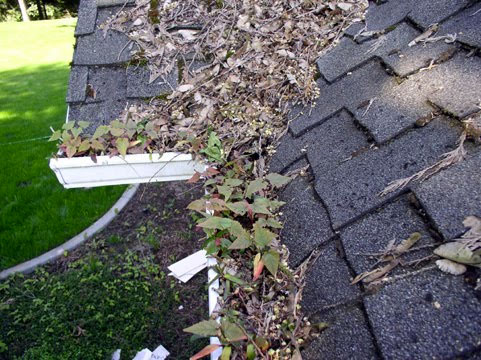
• Clear The Gutters Before the fall leaves start dropping, clear your gutters of any dirt and debris. Dirt and debris will stop water from freely flowing through the gutters and if temperatures drop, the water could freeze and cause damage. Start the season with clear gutters and check them periodically to make sure there is not too much buildup.

• Check Your Water Heater If you have not done routine maintenance on your water heater recently, now is the time. You can find more about water heater maintenance by searching this blog site. With your water heater maintained it will be ready to keep those hot showers coming all fall and winter long.

• Prepare Your Lawn Now is the time to sow winter grass, before the cold temperatures hit. By doing it now, your grass will have a good amount of time to grow and get healthy so that it can last through the winter.

• Inspect Your Roof Before cold weather, rain and snow hits, it is wise to inspect your roof for any damage. If there is damage to your roof, the bad weather that comes with fall and winter will only make it worse and could cause permanent damage that is not only frustrating, but very costly. Catching the problem now will give you time to repair the damage before the weather changes.

Clean Your Fireplace Chimney cleaning is something that is usually best left to the professionals. If done incorrectly, it could lead to major damage for your home and could harm individuals living in the home. A clogged up chimney is never good so it is wise to get a seasonal check by a professional to ensure that it is safe to light that fire when it gets cool.

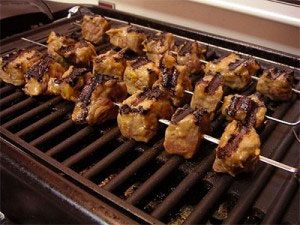
grillAll those nights of grilling out in the yard have produced some delicious meals.  There is just nothing quite like food right off the grill.  And with all of that use of your grill, it has probably left it looking dirty.  With such high temperatures, it seems like little cleaning would be involved to keep your grill up and running.  But, just like cooking on the stove, spills happen and need to be cleaned up.  While there the day to day cleanup of your grill is pretty basic, it is good to give your grill a good cleaning so that you can cook the best food for you and your friends and family possible.

Step 1:  Wire Brushing
When you cook your food directly on grill grates, it is bound to leave some charred food residue on the grates.  Purchase a stiff-bristled grill brush at any hardware store (and probably most grocery stores).  After you have brushed all of the debris off the grill grates, soak your grill brush in warm soapy water to clean.
Step 2:  Oil the Grill Grates
Spray your grill down with cooking oil or wipe it down with cooking oil once it has cooled.  This will help prevent food from sticking to the grill each time you use it.
Step 3:  Use Soap & Water to Clean
While it may seem like a grill might require more intense cleaning products, soap and water really do work well.  HowStuffWorks explains how to use soap and water to clean your grill, "If you've let your grill get out of hand and it's coated in cooked-on food, you may need to remove the grate and take care of it with some soap and water. This is always a good idea to do at the end of your grilling season. If your sink is large enough, you can use it for your soak, otherwise you'll need to use washtub or plastic bin. Or maybe even your bathtub. Fill the sink or bin with warm soapy dish washing liquid and let the grates soak for at least two hours. The longer you soak it, the easier it will be to get the gunk off. After the soak, remove the grate and scrub it with a stiff wire brush, rinse it and let dry. Make sure you never use any harsh chemicals like bleach or a chlorine powder. After all, this is what you cook your food on. You can also look for an all-natural, chemical-free liquid soap for your soak."
Step 4:  Clean the Burners
Food and grease fall on the burners while you grill and buildup over time.  Burners need to be cleaned properly so that you can achieve even cooking temperatures.  Scrub the burners with a wire brush once cooled to remove grease and debris.

kitchen-islandWith home ownership comes the responsibility of cleaning your home.  Every home needs a well stocked arsenal of cleaning supplies for whatever messes may arise.  Whether you are just moving into a home and starting your cleaning supply stockpile or trying to better round out your existing cleaning supplies, it is always good to have a variety of cleaning supplies at your reach.   You never know when or where a (or what kind of) spill may occur, and just the regular maintenance of your home will require a variety of cleaning tools.  Below is a list of essential cleaning tools that every home should have.
1.  Microfiber Cloths
Microfiber cloths are very handy for a variety of uses, but primarily, for dusting.  Any homeowner knows that furniture and decor accumulates dust...quickly.  While dusting is nobody's favorite job, it is one we must all do.  Microfiber cloths are incredibly effective at dusting.  Not only can microfiber cloths clean a surface almost entirely on their own, but they will not scratch or leave any marks on the surface.
2.  Broom, Dustpan and Mop
Yes, technically that is three things but they all work together.  Every floor needs to be mopped, but before it can be mopped effectively, it needs to be swept.  A good broom and dust pan will remove any debris, loose dirt  and more from the floor and make it an ideal surface to mop until it is so clean it is sparkling.
3.  Vacuum
If you have carpet or area rugs, a vacuum will be an essential tool in your home.  Many vacuums even have a hard floor setting so you can use them throughout your entire home.  Dirt and dust that settles into carpet can cause many problems for allergy sufferers and is just downright gross so your vacuum will be a very handy tool.
4.  Bucket
A bucket has many uses in a home and is an important tool for cleaning.  It can hold water for you while you mop, be placed under plumbing if you need to do work and can even hold your cleaning supplies while you clean around your home.
5.  Scrub Brushes
A good medium-bristled brush can do most tasks around your home but it may be a good idea to get a variety.  Soft-bristled brushes and hard-bristled brushes all have their uses around the house.  For scrubbing up messes on the floor, to cleaning the shower, to scrubbing the grout clean, scrub brushes are very handy.
6.  Sponge

A sponge is a useful cleaning tool in almost every room in the house.  It can be used to clean the kitchen or bathrooms, rinsed out, and used again.
7.  White Cotton Towels
White cotton towels are incredibly versatile and can be used in many ways.  They can be used to dry your dishes, clean up spills, mop up the floor and more.  The beauty of white cotton towels is you can easily tell when they are dirty and if they get stained, you can simply bleach them.

tools

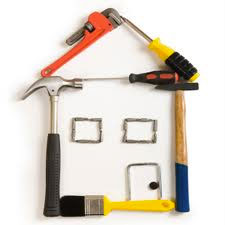
With home ownership comes the responsibility to take care of your home and make small (or large) repairs.  Whether you consider yourself a novice at home projects or are considering starting a side business as a handyman, every homeowner will probably have to do some home repairs at some point.  In order to do those repairs, it is necessary to have some common tools. You do not need to have a complete workshop in your garage to be able to do some basic repairs, but you will need the essentials.  Below is a list of essential tools that every homeowner should have in their arsenal.
1.  Hammer
A hammer is a basic tool that every homeowner needs to have.  Whether you are hanging pictures on the wall or assembling furniture, hammers come in very handy.  Get a claw hammer so that you can rip nails out of things as well.
2.  Screwdrivers
Everyone needs screwdrivers to be able to assemble things, unscrew battery cases on electronics and more.  But, you will need two kinds of screwdrivers, a Phillips head and a Flat head.  You can buy screwdrivers with interchangeable bits so that you can have different style bits and different size bits for whatever your need may be.
3.  Tape Measure
You know what they say, "measure twice and cut once."  An accurate measurement will save you time and frustration from having to do the job twice because measurements were inaccurate.  With a tape measure you can determine how far apart paintings should be hung, where you need to hang your curtain rod or just about any other project you can think of.
4.  Level
There is nothing more frustrating than hanging something and realizing it looks crooked.  Small levels are handy but a nice 3 foot level will be ideal for many projects.
5.  Electric Drill
An electric drill, whether or cordless or corded, may not seem like an "essential" tool for every homeowner but you never know when you will need a drill and when the occasion arises, you will be happy to have it.  An electric drill can drill, sand, grind, stir paint and handle almost any job.
6.  Handsaw
While you probably will not use your handsaw every week or even every month, it is a good tool to have on hand.  If you need to cut branches of trees in the yard or saw a project you are working on, a handsaw is an important and inexpensive tool.
7.  Flashlight
Whether the power goes out or you need to work under the sink on the plumbing, a flashlight is handy in a pinch.
8.  Wrench
An adjustable wrench is an essential tool.  It will adjust nuts and bolts and allow you to work on things like plumbing if there is a problem.
9.  Locking Pliers
Pliers are handy for gripping something and plying it out of place.  But, locking pliers have even more uses.  They can lock into place and be used as a vice or clamp.
10.  Utility Knife
While you need to handle this with great care to avoid injury (as you do with any tool) a utility knife can be incredibly handy.  A utility knife is a great tool for opening big boxes or cutting rope.  You may not need it often, but when you do, you will be glad you have it.

babyWhen you have a child, nothing is more important than their safety.  Any parent has probably read about childproofing or their pediatrician has advised them about childproofing.  Most people know to plus the outlet covers and lock the cabinets that contain anything dangerous to children like chemicals, cleaning products, silverware or other things.  But, one thing many people do not give as much consideration to is how to childproof their appliances.  You may think, "they are a baby (or toddler, or child)...they are not really capable of opening the refrigerator, or getting into the washing machine."  But, what if they do, and injure themselves?  When it comes to childproofing, better safe than sorry should always be the approach.  Read more about how to properly childproof your appliances below.
Refrigerator:  Depending on the configuration of your refrigerator, you can secure your refrigerator doors with latches.  If it is a side-by-side refrigerator, install latches (you will need two) on the doors that are out of reach of the children.  If it is a traditional refrigerator with one door and a freezer on top, secure a latch for the freezer and one for the door separately.  If you have a refrigerator that has side-by-side doors on top and a refrigerator drawer on the bottom, you will need three separate latches to properly secure your refrigerator.  If you store medication in your refrigerator, keep it on the top shelf so that it is out of reach of children in case they do manage to get into the refrigerator.
Oven:  If knobs are on the front of your oven, and children can reach them, you should install knob covers or locks to prevent little hands from reaching up and turning burners on the stove on.  When cooking, use back burners whenever possible to prevent children from reaching up and trying to touch the top of the stove, resulting in accidental burning.  If you are using the front burners, turn the handles of your pots and pans away from the edge and towards the wall so that children cannot reach up and pull a hot pan down on themselves.
Dishwasher:  Dishwashers have two things you do not want your children to get into: chemicals and sharp objects.  Install a dishwasher lock to keep curious little hands out.  Also, keep silverware pointed down so that sharp edges are not sticking straight up.  Lastly, start your dishwasher as soon as you put dishwasher detergent in to prevent your children from getting into it and accidentally ingesting it.
Washer and Dryer:  Many modern washers and dryers contain "childproof" settings that can be enabled to prevent children from opening the machine during a wash and dry cycle.  It will also prevent them from making any changes during cycles because they try to press the brightly colored buttons on the front.  You can also install an exterior safety lock on the machine that will be one additional preventive measure against children getting in.